Fusible Web vs Fusible Interfacing: Wait, there's a difference?!?
- Jen Wagner

- Feb 27, 2023
- 4 min read
Updated: May 31, 2025
My sewing journey began in the world of clothing construction so when I jumped into quilting, my brain put fusible web and fusible interfacing into one category and I really feel like I'm not alone in this matter. They look similar and applying them often feels the same! To make telling them apart more difficult, when you shop for them, they're often on the same shelf and both come on bolts and individual packages. Seriously! I know! Having so many similar products to choose from can feel overwhelming but the pro: All this variety lets us use the product that is perfectly matched to our project! There are some differences so let me shine some light on things...
First of all, fusible means that you iron it to make it stick. Different products need different heat settings and some dry and some with steam so read the instructions that come with your product.
A fusible web is a heat activated glue sheet or tape that bonds two layers of fabric together. It also stabilizes the fibers of the fabric making it less likely to fray. Yay I can wash it! Some fusible webs have paper on one side that you can use to draw on. You can also iron on the paper side! If the fusible web doesn't have a paper side, freezer paper or a reusable teflon sheet can be used between your iron and webbing.
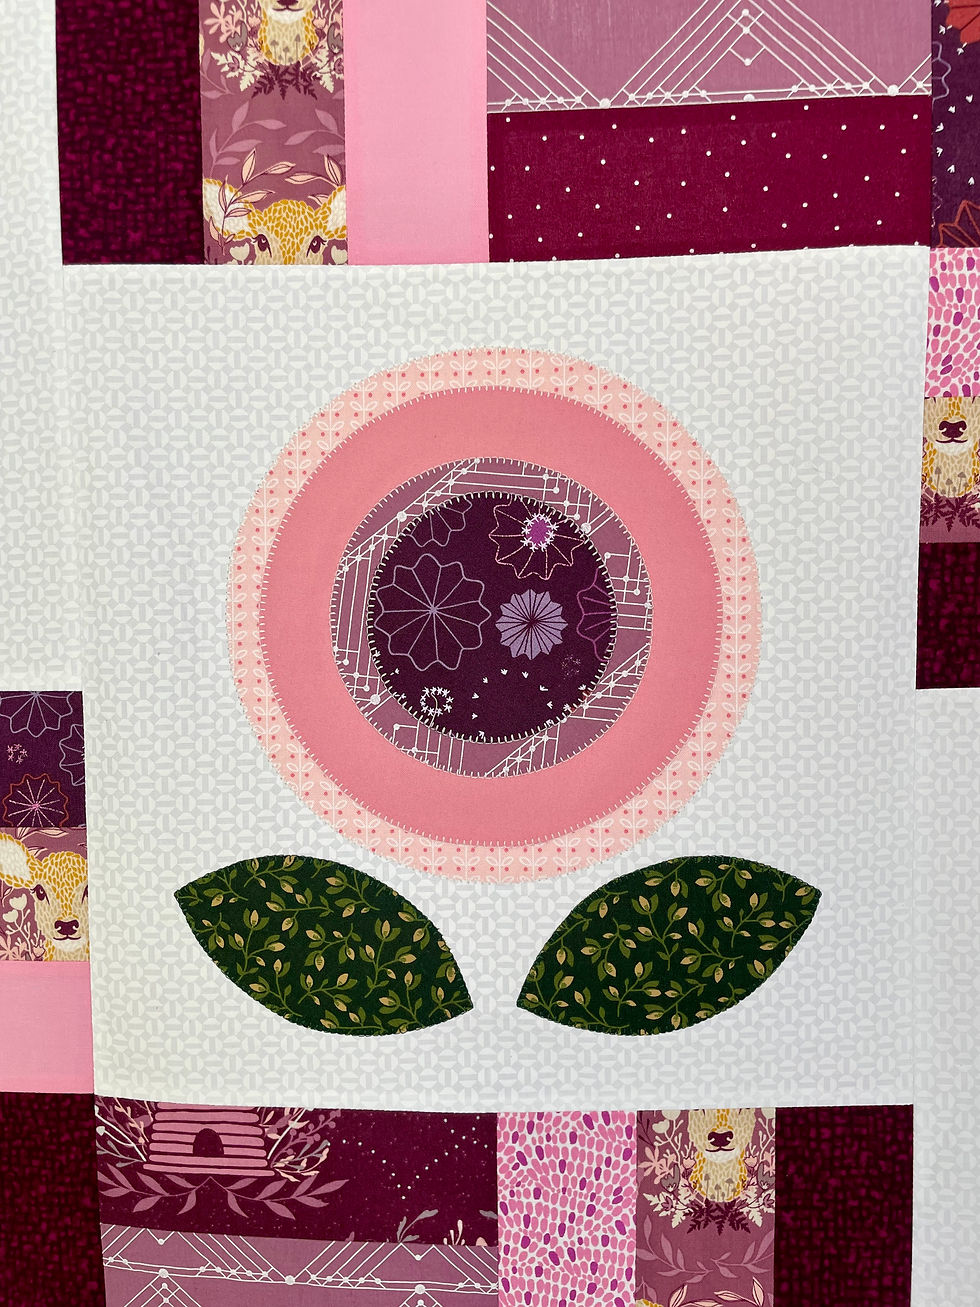
Fusible web is used in the quilting world for raw edge applique (don't worry, I describe how to do this SIMPLE technique later in this post). I used this technique in my Fenced In quilt pattern to make the flowers and petals. After fusing the circles, I stitched them with a machine blanket stitch and I just love how cute it turned out! When I wrote this pattern, my brain decided to use the word interfacing instead of web and just recently a quilter kindly pointed it out! So clarification is needed... Use a fusible web not a fusible interfacing to make this quilt. Thanks Diana!
When making clothing or curtains, using a fusible web is a quick and easy way to do a hem.
Interfacing on the other hand is a fiber layer that is used to give shape and stability in collars, bags, hats, etc; to reduce stretch in fabrics like knits; or to add strength to areas like button holes. It comes in sew-in, single sided fusible, and double sided fusible varieties. Some interfacings also come in black.
In the quilting world, one of my favorite fusible interfacings is batting tape! No more zigzagging or hand basting batting pieces together! Heat Press batting tape is a light weight interfacing with heat activated glue on one side. The first time I used it, I had it upside down and stuck it to my iron instead of my batting. Facepalm. Thankfully the gunk came right off by ironing a used dryer sheet. The fusible side of any interfacing is difficult to tell when you're watching someone use it on a video or in a photo but when it's in your hands, it's usually much more obvious because the glue side is bumpy and textured.
Matching the right product to a project is key so once you know if you need interfacing or webbing, it's time to pick the right weight. With fusible web, match the weight of your web to the weight of your fabric. Since quilting cottons are lightweight, use a lightweight fusible web with them. Generally this same rule works with interfacing but with interfacing you can mix it up, depending on your project needs. Interfacing also has different types including woven, non-woven, and knit. This allows more specific matching to the fabrics being used so that the interfacing does not change the way the original fabric hangs or drapes. There is even fusible foam for bags and mouse pads and fusible fleece for placemats and tablecloths.
How to use a fusible web for raw edge applique:
1. Choose a lightweight fusible web with paper on one side.
2. Draw or trace your design on the paper side.
3. Roughly cut around your design.
4. Place the fusible web glue side down (paper side up) on the wrong side of the applique fabric.
5. Follow the manufacturer's instructions for iron settings and press on the paper side of the web.
6. Give it a moment to cool then cut along the line of your design.
7. Remove the paper backing.
8. Position your applique shape glue side down on the right side of your background fabric.
9. Press according to manufacturer's instructions then stitch around the edges if desired.
Tips for best fusible results:
1. Use the correct heat and steam settings on your iron. Read the instructions on the package and follow them.
2. Never iron directly on the glue side. It will stick to your iron!
3. Don't over heat the fusible. This will cause it to harden making your fabrics stiff and may yellow or even bubble.
A couple of light weight fusible webs with a paper side:
Heat n Bond Lite - I've been using this one for years
What is your favorite fusible web? What do you love about it?
Happy Quilting!


Comments